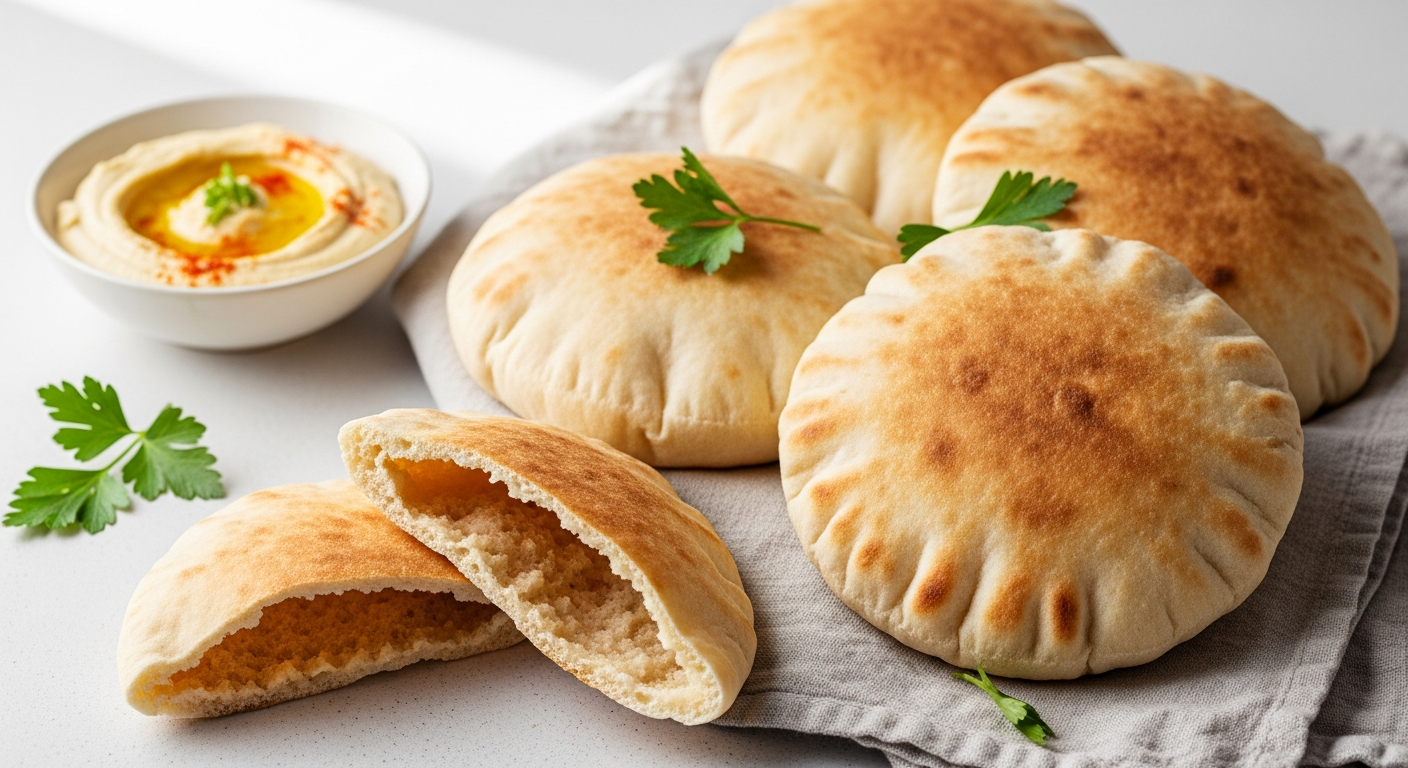
There’s something undeniably magical about biting into warm, freshly baked pita bread-the pillowy softness, the subtle chew, and that perfect little pocket just waiting to be filled with your favourite ingredients. While store-bought pita often falls short,lacking that homemade charm,crafting your own pita bread is easier than you might think. In this article, we’ll guide you through a simple, foolproof recipe that transforms just a few basic ingredients into golden, fluffy pockets of bread bursting with flavor. Whether you’re a seasoned baker or a kitchen novice, prepare to impress yourself with homemade pita that’s both delicious and delightfully satisfying.
Perfect homemade pita bread begins with the careful selection of ingredients that ensure softness, fluffiness, and that iconic pocket we all love. The journey to crafting this middle Eastern classic is as rewarding as the aroma wafting from your oven, capturing the essence of simple, wholesome baking at its best.
Prep and Cook Time
- Planning: 20 minutes
- First Rise: 1 hour
- Shaping & Second Rise: 30 minutes
- Baking: 5-7 minutes per batch
- Total Time: Approximately 2 hours
Yield
Makes 8 large pita breads (6-7 inches each)
Difficulty Level
Easy to Medium – Ideal for bakers with some basic dough experience
Ingredients
- 3 ½ cups all-purpose flour, sifted
- 1 ¼ cups warm water (110°F/43°C)
- 2 teaspoons active dry yeast
- 2 teaspoons granulated sugar
- 1 ½ teaspoons fine sea salt
- 2 tablespoons extra virgin olive oil, plus more for coating
Instructions
- Activate the yeast: In a small bowl, combine warm water, sugar, and yeast.Stir gently and let sit for 5-10 minutes until foamy and active. This step ensures your dough will rise beautifully.
- mix the dough: In a large bowl,whisk together the sifted flour and sea salt. Create a well in the center and pour in the activated yeast mixture and olive oil. Using a wooden spoon or your hands,combine until a shaggy dough forms.
- Knead for elasticity: Transfer the dough to a lightly floured surface. Knead vigorously for 8-10 minutes until the dough becomes smooth,soft,and slightly tacky but not sticky. Proper kneading develops the gluten network, critical for that signature pita pocket.
- First proofing: Lightly oil a clean bowl and place the kneaded dough inside. Cover with a damp cloth or plastic wrap and let it rise in a warm draft-free spot for 1 hour, or until it doubles in size.
- Divide and shape: Punch down the dough to release excess air. Divide into 8 equal pieces and gently roll each into a smooth ball. Allow them to rest for 10 minutes-this final rest aids in elasticity, making the dough easier to roll.
- roll out the rounds: On a lightly floured surface, roll each ball into a 6-7 inch diameter circle, about ¼ inch thick. evenness here is key; too thin and they won’t puff properly, too thick and they may not cook evenly.
- Second proofing: Place the rolled dough circles on parchment-lined baking sheets, cover loosely with a kitchen towel, and let them rise for another 20-30 minutes until slightly puffy.
- Preheat the oven: Set your oven to 475°F (245°C) and place a baking stone, cast-iron skillet, or inverted heavy baking sheet on the middle rack to heat thoroughly. A super-hot surface is essential for the pita’s characteristic puff.
- Bake to perfection: Carefully transfer 2-3 pita rounds onto the preheated surface.Bake for 5-7 minutes until they puff up dramatically and develop golden-brown spots. Remove and immediately cover with a clean towel to keep the breads soft.
- Cool and serve: Let the pita cool slightly before slicing or stuffing. The pockets will remain soft and elastic, perfect for fillings or dipping.
Tips for Success
- Flour type matters: Use high-quality, unbleached all-purpose flour for the best gluten formation. For chewier pitas, experiment with a blend of bread flour and all-purpose flour.
- Water temperature: Too hot will kill yeast; too cold will delay rising. Aim for 110°F (water feels warm but not hot to the touch).
- Don’t skip resting: Both proofing stages develop flavor and dough elasticity, which pave the way for perfect puffed pockets.
- Heat is key: Preheating your baking surface is non-negotiable for authentic pita flavor and structure. Avoid overcrowding-bake a few at a time for consistent results.
- Make ahead: Dough can be refrigerated after the first rise for up to 24 hours. Bring to room temperature before shaping for easier handling.
Serving Suggestions
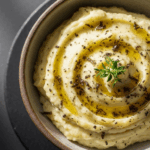
Slice the pita breads open and fill them with vibrant falafel, creamy hummus, crisp tabbouleh, or smoky grilled meats. For a simple snack, brush warm pitas with garlic-infused olive oil and sprinkle za’atar seasoning before serving. Garnish with fresh parsley, lemon wedges, and a drizzle of cool yogurt tahini sauce for an unforgettable feast.

| Nutrient | Per Pita (Approx.) |
|---|---|
| Calories | 180 |
| Protein | 6g |
| Carbohydrates | 36g |
| Fat | 2g |
For further tips on baking and pairing your homemade pita bread, check out our favorite hummus recipe and explore authentic Middle Eastern flavors. To deepen your knowledge on bread science,visit the King Arthur Baking Guide, a trusted resource among home bakers worldwide.
Q&A
Q&A: Perfect homemade Pita Bread - A Simple, Delicious Recipe
Q: Why make pita bread at home instead of buying it at the store?
A: Homemade pita bread is fresher, fluffier, and far more satisfying than its store-bought counterpart. Plus,making it yourself lets you control the ingredients-no preservatives or additives,just simple,wholesome goodness. It’s also a fun kitchen project that fills your home with the irresistible aroma of baking bread!
Q: What’s the secret to getting that iconic pita pocket?
A: The magic lies in the baking temperature and dough hydration. Baking at a high temperature (around 475°F/245°C) creates steam inside the dough,which puffs it up and forms the pocket. Also, a well-hydrated dough helps create a soft interior with just enough elasticity to trap the steam and puff beautifully.
Q: Can I make pita bread without a special oven or pizza stone?
A: Absolutely! While a pizza stone or baking steel helps mimic that professional heat retention, you can bake pita on a preheated heavy-duty baking sheet or cast-iron skillet. The key is to get your oven piping hot and preheat your baking surface to give the pitas a quick burst of heat.Q: How long does it take to prepare and bake homemade pita bread?
A: The hands-on time is surprisingly short-about 10 to 15 minutes to mix and knead the dough. After that, you’ll let it rise for roughly 1 to 1.5 hours, then it’s just a few minutes per batch in the oven. From start to finish, expect around 2 hours, but most of that is waiting time, perfect for prepping your favorite fillings!
Q: Can I customize the flavor of my pita bread?
A: Definitely! While the classic pita is simple and slightly tangy, you can fold in herbs like rosemary or za’atar for a fragrant twist. A little garlic powder or cumin adds a savory depth. Just add your extras sparingly to keep the dough light and airy.
Q: how do I know when my pita bread is done baking?
A: Perfect pita puffs up, turns a lovely light golden-brown, and has a soft but slightly chewy texture. If it’s too pale, it may lack flavor; too dark and it might be a touch dry. Your oven’s heat will be your best guide,so keep an eye on the first few pitas and adjust timing accordingly.
Q: What are some great uses for homemade pita bread?
A: Oh, the possibilities! Split the warm pitas to create pockets for falafel, gyro meat, or your favorite fresh veggies and hummus. Cut into wedges and serve as dippers with baba ganoush or tzatziki.Or simply enjoy them fresh with a pat of butter and a sprinkle of sea salt. Homemade pita transforms everyday meals into something special.
Q: Can I store homemade pita bread,and how?
A: Yes! Let the pitas cool entirely,then store them in an airtight container or resealable plastic bag at room temperature for up to two days. For longer storage, freeze them flat in a zip-top bag for up to a month.To refresh,warm them briefly in a hot oven or on a skillet-they’ll regain that fresh-baked charm in no time.
Q: I’m a beginner baker-will this recipe be too difficult?
A: Not at all! This recipe is designed to be approachable and forgiving. Even if it’s your first time making bread from scratch, you’ll find the steps straightforward and satisfying. The best part? Each pita you bake builds your confidence and fills your kitchen with deliciousness.
Ready to roll up your sleeves and create pita bread magic at home? Let this simple recipe guide you to flaky, fluffy perfection every time!
Closing Remarks
Baking your own perfect pita bread at home is more than just a recipe-it’s an invitation to bring warmth, tradition, and a touch of magic to your kitchen. With simple ingredients and a few easy steps, you’ve unlocked the secret to pillowy, golden pockets that can elevate any meal. Whether you’re filling them with fresh veggies, savory dips, or your favorite grilled meats, these homemade pitas offer both comfort and versatility. So next time hunger calls, remember: the perfect pita is just a mix, knead, and puff away-ready to transform everyday dining into a delicious, hands-on experience. Happy baking!