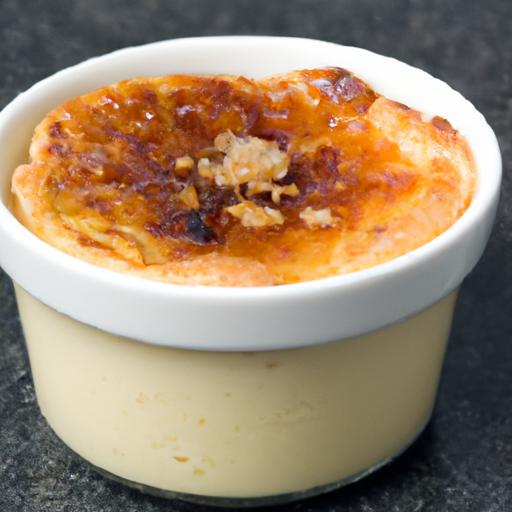
There’s something undeniably magical about cracking through the caramelized sugar crust of a perfectly crafted crème brûlée, revealing the luxuriously smooth, creamy custard beneath. Achieving that flawless balance of silky texture and rich flavor has long been the hallmark of fine dining-frequently enough seeming just out of reach for the home cook. Enter sous vide, the culinary game-changer that unlocks precision and consistency like never before. In this article, we’ll dive into the art and science of mastering sous vide crème brûlée at home, guiding you step-by-step to create a dessert that’s not only impressively elegant but effortlessly foolproof. Prepare to elevate your kitchen repertoire and indulge in silky perfection with every bite.
Perfectly Silky: Mastering Sous Vide Crème Brûlée at Home begins with selecting the highest-quality ingredients that promise that luscious, creamy texture synonymous with this classic French dessert. The balance of creaminess and delicate structure hinges on every component-from the freshest organic egg yolks to the precise ratio of heavy cream and vanilla beans. Unlocking the science behind sous vide precision turns this dessert into a foolproof masterpiece, ensuring a custard so smooth it practically melts on the tongue.
Choosing the Ideal Ingredients for Ultimate Creaminess
The foundation of a Perfectly Silky: Mastering Sous Vide crème brûlée at Home lies in ingredient quality and balance. Begin with farm-fresh egg yolks, which contribute essential richness and a vibrant hue. For the cream, opt for heavy cream with at least 36% fat content; it’s the fat molecules here that foster that satiny mouthfeel characteristic of sublime custards. Whole vanilla beans-not extracts-imbue the custard with natural aromatic complexity. And of course, pure granulated sugar acts both as a sweetener and the material for the gloriously crackling caramelized crust.
unlocking the Science Behind sous Vide Precision
The magic of sous vide cooking lies in its unwavering temperature control, allowing the custard to set gently without curdling or overcooking. At a steady 82°C (180°F), the protein structure within the eggs coagulates slowly, creating a custard that’s uniformly set with no grainy edges. This scientific precision eliminates guesswork-no more ‘too-runny’ or ‘over-baked rubbery’ textures. Vacuum sealing keeps moisture locked in,intensifying flavors and preventing water dilution during the bath.
Prep and Cook Time
- Readiness: 15 minutes
- sous Vide Cooking Time: 1 hour 15 minutes
- Chilling Time: 2 hours minimum
- Caramelizing: 5 minutes
Yield
Serves 6 elegant portions
Difficulty Level
Medium – perfect for home cooks ready to harness sous vide technology with confidence
Ingredients
- 6 large egg yolks, preferably organic
- 1 ¼ cups heavy cream (36% fat)
- ½ cup granulated sugar, plus extra for caramelizing
- 1 vanilla bean, split lengthwise and seeds scraped
- Pinch of fine sea salt
Step by Step Guide to Achieving the Perfect Silky Texture
- Prepare the custard base: In a medium bowl, whisk the egg yolks and ½ cup sugar until the mixture lightens and thickens slightly. This aeration is key for a smooth custard.
- Infuse the cream: Heat the heavy cream with vanilla bean seeds and pod over medium heat until it just begins to simmer. Remove from heat, cover, and let steep for 15 minutes to extract maximum flavor and fragrance.
- Temper the yolks: Slowly add the warm vanilla cream into the yolk mixture, whisking constantly to prevent scrambling. Once fully combined,strain the custard through a fine sieve to ensure a velvety finish.
- Seal and sous vide: Pour the custard into 6 ramekins. Vacuum seal the ramekins in sous vide bags or use heavy-duty ziplock bags with water displacement method,eliminating air to guarantee even cooking.
- Cook precisely: Set your sous vide device to 82°C (180°F) and cook the custards for exactly 1 hour and 15 minutes. This gentle heat will firm the custard softly without losing silkiness.
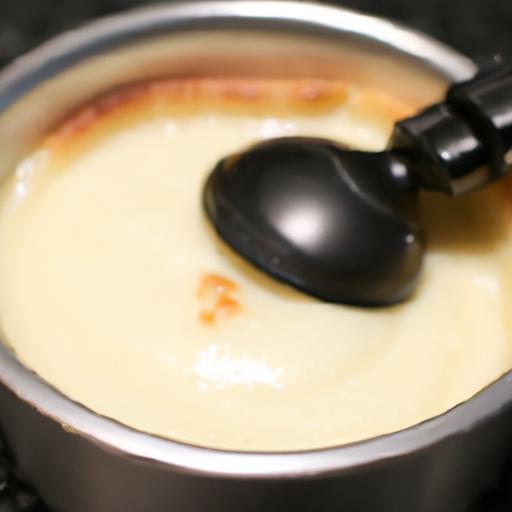
- Chill thoroughly: Remove the custards from the water bath and cool immediately in an ice bath for 10 minutes, then refrigerate for at least 2 hours. Temperature control here solidifies the perfect creamy texture.
tips for Crafting the Ideal Caramelized Crust Every Time
- Dry the surface: Before caramelizing, pat the custard tops dry with a paper towel to avoid clumping or uneven caramelization.
- Even sugar layering: Sprinkle a thin, even layer of granulated sugar on each custard.Avoid pressing the sugar down; let it naturally nestle for consistent melting.
- Use a kitchen torch: Hold the flame about 2 inches above the sugar surface and move evenly in circular motions until a rich, golden-brown crust forms. Avoid staying in one spot to prevent burning.
- Alternative method: If you lack a torch, preheat your oven’s broiler, place custards close to the heat source for no more than 3 minutes, watching carefully to achieve a perfect caramelization.
Chef’s Notes
- For a dairy-free twist, substitute heavy cream with full-fat coconut milk, though texture may vary slightly.
- If vanilla beans are unavailable, use pure vanilla paste; avoid extracts as they dilute flavor intensity.
- To prepare ahead, sous vide the custards and refrigerate. Caramelize sugar just before serving for crisp freshness.
- If your custard cracks or weeps, reduce cooking time or lower sous vide temperature slightly to achieve flawless results next time.
Serving Suggestions
Present your Perfectly Silky: Mastering Sous Vide Crème Brûlée at Home in shallow white ramekins to contrast the caramelized crust’s golden hue. Garnish with a few fresh raspberries or edible flowers for a pop of color. Pair with a light,floral dessert wine like Sauternes or a cup of rich espresso to balance sweetness with bitterness. For striking texture contrast, serve alongside a crisp shortbread biscuit.

| Nutrient | Per Serving |
|---|---|
| Calories | 350 kcal |
| Protein | 6 g |
| Carbohydrates | 30 g |
| Fat | 24 g |
For more on the science of sous vide cooking and other decadent desserts,check our Ultimate Sous vide desserts Guide.To deepen your culinary knowledge, explore Serious Eats’ expert sous vide techniques.
Q&A
Q&A: Perfectly Silky – Mastering Sous Vide Crème Brûlée at Home
Q: What makes sous vide crème brûlée different from the traditional oven-baked version?
A: The magic of sous vide lies in its precision. Rather of baking in a hot oven, sous vide gently cooks the custard in a temperature-controlled water bath. This means your crème brûlée emerges silky smooth, evenly cooked from edge to center, with zero risk of curdling or cracking. The result? A custard so decadently creamy,it practically melts on your tongue.
Q: How does the sous vide method affect the texture of the crème brûlée?
A: Think of sous vide as a slow, tender hug for your custard.The low-and-slow cooking keeps the proteins well-behaved, preventing them from tightening up too much. Rather of a dense or rubbery finish,you get an ultra-silky,velvety texture that just screams gourmet indulgence.
Q: Can I use any type of cream and eggs for sous vide crème brûlée?
A: Absolutely, but quality counts.Heavy cream with at least 30% fat ensures richness and a luxurious mouthfeel. Fresh whole eggs or pasteurized eggs work well; pasteurized is safer if you’re cautious about raw eggs, especially as sous vide custards frequently enough cook at lower temps than traditional ovens.
Q: How do I prevent my crème brûlée from getting waterlogged during sous vide cooking?
A: keeping your custard nestled in airtight pouches or jars sealed tightly is key. Vacuum-sealed bags are perfect if you have the gear, but good-quality mason jars with lids work beautifully too. Just be sure the lids aren’t too tight to allow for thermal expansion and have a little wiggle room for water to circulate around evenly.
Q: What temperature and time are ideal for sous vide crème brûlée?
A: Aim for around 176°F (80°C) and cook for roughly 1 hour. This strikes the ideal balance between fully setting the custard and preserving that creamy texture. Depending on your preference, some chefs nudge the temperature a little lower for a slightly looser custard or a tad higher for a firmer set.
Q: How do I caramelize the sugar topping without ruining the silky texture below?
A: The classic finish calls for a speedy sugar brûlée with a kitchen torch. After sous vide cooking, chill the custards wholly, sprinkle an even layer of superfine sugar on top, and blast with your torch until a crisp golden crust forms. This contrast between the glassy shard of burnt sugar and the silken custard beneath is what makes crème brûlée so swoon-worthy.
Q: Can I infuse flavors into my sous vide crème brûlée?
A: Absolutely! Sous vide is a flavor playground. Vanilla beans are classic, but try steeping lavender, citrus zest, coffee beans, or even a hint of cardamom in your cream before cooking. The gentle heat ensures flavors blossom without bitterness or harsh notes.
Q: What are common mistakes to avoid when making sous vide crème brûlée?
A: Overfilling jars can cause uneven cooking or leaks. Not sealing jars properly risks water intrusion, which ruins texture. Skipping the chilling step before torching can cause your custard to overheat or lose its set. Lastly, torching too long risks melting the custard beneath the caramelized crust.
Q: Is sous vide crème brûlée beginner-pleasant?
A: With a sous vide cooker, yes! It’s surprisingly foolproof compared to oven baking as the temperature control is precise and constant. It’s a fantastic way to impress guests or treat yourself to a restaurant-quality dessert right at home.
Unlock the secrets of silky perfection and elevate your dessert game-your sous vide crème brûlée awaits!
The Conclusion
As you close the lid on your sous vide setup and let that sweet custard work its magic, remember that mastering crème brûlée at home is less about precision and more about patience-and a touch of culinary curiosity. With this gentle, hands-off method, you unlock a world where silky textures and caramelized crowns coexist in perfect harmony every time. So go ahead,torch that sugar,listen for the satisfying crack,and savor the triumph of a flawlessly executed dessert that’s as extraordinary to serve as it is indeed to eat. Your journey into sous vide crème brûlée mastery is just beginning, and the possibilities are as endless-and delicious-as your imagination.